When we decided on buying Owls Lodge, a big appeal was the size of the garage. The endless possibilities of a 20*21 foot, mancave had the brain cells flickering in overdrive. Visio came to the rescue again for space planning. My basic requirements were that I wanted a small clean area for my PC and electronics, a spacious area with racking and benches for woodworking and furniture up cycling and an area for garden tools and the ride on mower. I found three internal doors on Freecycle in Bath, so that was a starting point. With seven Screwfix racks, two existing work benches and my saw table, the plans started to crystallise.
The first major job was to plasterboard the ceiling. An easy job if you are tall and know what you’re doing. Me, I’m short and inexperienced. I hired a dry wall lifter which I was assured was the best for the job. Even a half sheet on my fingertips only just made it to the top of the lifter. I then had to jack up the pair of T section arms up to the 2.5m ceiling joists and using a combination of stepladder and platform, I managed to screw the boards in place. In amongst all this, I needed to constantly move stuff out of my pending work area. It took me five days and I broke two sheets as the macho side of my brain told me I could easily lift an 8*4 foot sheet on my own, because it’s only 23kg!! How the mighty have fallen, or plasterboard sheets to be correct as I went flying sideways with style, the sheet however failed to stay suspended in space and time and landed on a corner after breaking up like the Titanic. After cursing a little, I stuck to half sheets. A completely empty garage and a mate could do this in a weekend, however……
The clean area was another quandary; plasterboard, thermal board, MDF or OSB? Ended up with OSB as the 2.4 * 0.6m board have tongue and groove edges which help with the walls and floor joints. Also, I can handle that size board on my own. The OSB and battening now awaits the Celotex delivery ….
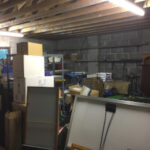
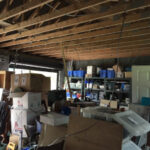
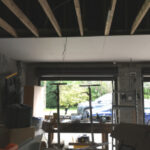
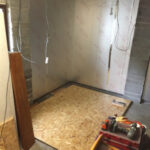
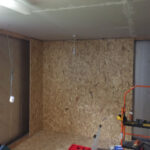

The Celotex arrived as promised and with the aid of modern technology, I could track the vehicle from half way along the M4. The driver and I lifted the 14 sheets in one go off the vehicle with not a bead of perspiration in sight. Perhaps I should have used these to board the ceiling! The first attempt of attaching the boards worked, but Grip Fill was not the optimum solution. A stronger adhesive was spray-on Polyurethane foam which sticks like whatsit to a blanket and goes off in a few hours. As the boards had a slight curve, a piece of OSB was used to hold the panels flat while the glue went off. A good mornings work and a perfect time to let chemistry take over.
The nice thing with the T&G sheets is that you don’t need a supporting frame as you would for plasterboard. The corner joints were created by cutting the corner out of the basic 50x75mm rough sawn timber. This results in an L shaped profile to support the two OSB walls and screwed together as required. Unfortunately, my old Black and Decker circular saw finally drew its last breath and in an an expulsion of smoke and white sparks, died. And as they said in Monty Python “bereft of life, he rests in peace”. Knowing I had a lot more wood to cut, I again visited Screwfix and purchased a Mac Allister 1500W monster with a laser sight.
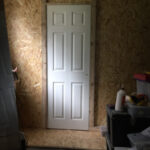
The framework went well until I tried to hold a 3.4m length of wet timber over my head to fix to the ceiling, whereupon I abandoned said plank in favour of myself. On the second attempt, I fixed up some additional supports with great success. The doors were fixed in place by the hinges and then the other door frame added with OSB cut to suite. Not your standard way of construction, but so what, it’s not as if it will be shown at the Ideal Homes exhibition. The inside of the clean area was given a coat of white emulsion to brighten the OSB’s orange finish.
A bit of local wiring for sockets, a bench, some shelves, soldering iron, PC and voila, a working clean area. Oh, and a lightbulb.
October 18th
As a result of pure fluke, the partition wall for the mower/woodworking area turned out to be exactly 2.4m, which in DIY terms means four OSB T&G sheets. Ker-ching. As the ceiling height was 2.5m, I opted for the cut a 25mm section out of the 75 x 50mm sawn timber, which left a lip to put the OSB on. The batten was then screwed to the concrete floor for stability and corresponding beams were screwed to the ceiling. Once the wall was in place, I re-positioned the door, added a frame and then the remaining wall pieces. Celotex was fixed to the mower section outside wall and bench electrics added. Everything got sorted and put back with additional storage added.
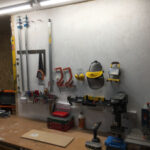
The woodworking area had the benches levelled and fixed to the “freshly painted” wall for stability, and electrics, tool racks and tool fixings added. I did wonder about doing the outline of the tools with a felt pen, but thought it was too much like a murder scene where the chalk outline of the dead body was. Ah a G clamp was there, but has finally lost a grip on life!
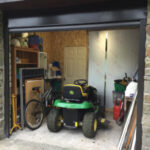
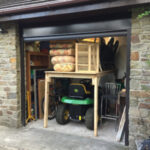
Having abandoned the idea of a summerhouse this year – see October blog – the question we faced was to leave the conservatory as a storage (dumping ground) for furniture or put it into storage. I had a moment of lateral thinking and rashly suggested building a platform over the top of the mower to put the summerhouse furniture and cushions on. With some spare OSB sheets and timber, a nice after lunch project resulted in probably the worlds first mower with mezzanine storage. The downside is I can no longer just drive the mower into the garage, unless I want to do a Marie Antoinette! So, park up, disengage drive and push mower slowly in. Well at least there’s no chance of hitting the end wall at speed. The furniture only just went under the roller door – I had visions of having to undertake some serious re-jigging if all else failed. So the new workshop has been put to good use already.
All the electrics are complete and will be inspected/certified in due course. So the last bit of wall cladding remains to be done, slap a coat of paint on any exposed OSB, tidy up any outstanding “do later’s” and fit door handles (if they ever turn up from China). The floor can wait until next year as I’m not sure what to do yet, and the lure of possible post Christmas sales awaits.
